

There is an innumerable amount of articles and tutorials teaching parts and pieces of retouching portraits. However, finding the ones with quality techniques and information can take days. Furthermore, there is no singular tutorial that teaches a complete set of methods to retouch portraits free of charge. Finding the right tutorials for each aspect of editing can become very time consuming. This article contains 5 years of research for achieving the greatest methods to retouch a portrait.
Before diving into the material of the article, it is important to note that the quickest, most efficient way to gain the knowledge on retouching is probably one of the paid tutorials. For beauty and studio photographers, Michael Woloszynowicz has the perfect tutorial on high-end retouching. He is not only gifted with his photography and retouching, but also in delivering over information in a clear and concise manner. Anyone on any level can understand the information. For portrait photographers interested in learning a quick and easy way to retouch portraits, while also making them pop, I released a tutorial a few months ago with RGGEDU. In this tutorial I take you on 9 portrait sessions in different locations using natural light only and I share my entire post processing workflow for each shoot. Additionally I include my action that allows you to knock out edits within 15 minutes.
Another quick thing I'd like to point out is the false concept that "it's all about the editing". IT'S NOT. Editing an image will only take a great photo over the edge. It will not change a bad photo into an excellent photo. The purpose of the methods I'm about to share is not to change the photos, rather to enhance it.

Culling
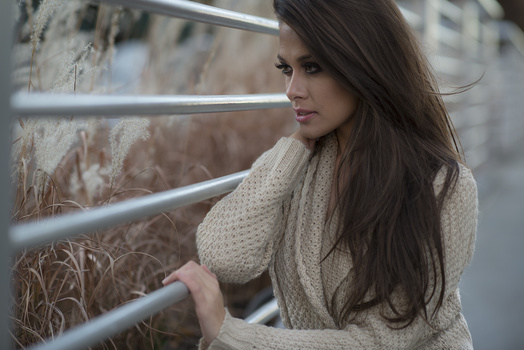
Culling images is simple. The importance of it is often overlooked. Even with the best retouching methods, if the right photo to edit wasn’t chosen, the results won’t be exciting or pleasing to the eye. Choosing 3-5 images out of 500 from a photoshoot is hard. In fact, it’s an art-form. I’ve found the best way to narrow it down is to select 35 images and then show it to friends and family and let their instincts help you.
Another important thing to remember is that it is always best to go with the more natural poses. While creativity is important, it is equally important to not overdo things and try too hard.
There is no technique to culling. It is all about finding an image that is pleasing to the human eye. And that is what makes it the most difficult because there is a tremendous amount of subjectivity involved. That is why it is best to share it with as many people as you can. Forget about a technically perfect image. Find an image that speaks to you and your friends. For more on this, check out the following article: A Technically Perfect Photo is Meaningless
To cull images:
Open adobe bridge - navigate to the folder with images - hit the space bar and use the arrow keys to navigate - hit any number between 1 -5 to rate the image - hit the space bar again and then press enter (this opens the image in CameraRaw or Photoshop).

Camera Raw
People often confuse Camera Raw as the place where special effects and filter adjustments are made. However, CR helps create a foundation for which to continue editing on Photoshop. CR is not where amazing results happen. It’s used to make RAW adjustments like, bringing back some detail in the highlights, adjusting the white balance.
With that in mind, it is important to avoid making global adjustments like using the exposure and contrast slider. Adding contrast is something that can be done manually in the editing process, if you add contrast in CR you will notice toning issues on the skin and eyes becoming dark and unrecoverable. If there is something small that is bothersome, for example the skin is on the darker side, there are methods to brightening that without using the exposure slider which over brightens the background in the process. Hit up the luminosity slider, the orange and red slider can be used to brighten the skin and leave everything else alone. Clarity is frowned upon but about 10 usually makes the image pop and makes dodging and burning easier. It will make flaws such as pimples stand out more but that's ok since you will spot heal that later anyways.

Photoshop
Spot Healing
This tutorial shows you how to spot heal blemishes in the skin, you can use this for stray hairs on the skin as well. DO NOT take his advice on using the patch tool for the bags under eyes. This is a huge nono since you mess with the textures. I will explain under the next section of this article how to fix bags.
https://www.youtube.com/watch?v=zJ_B9bbEe7M

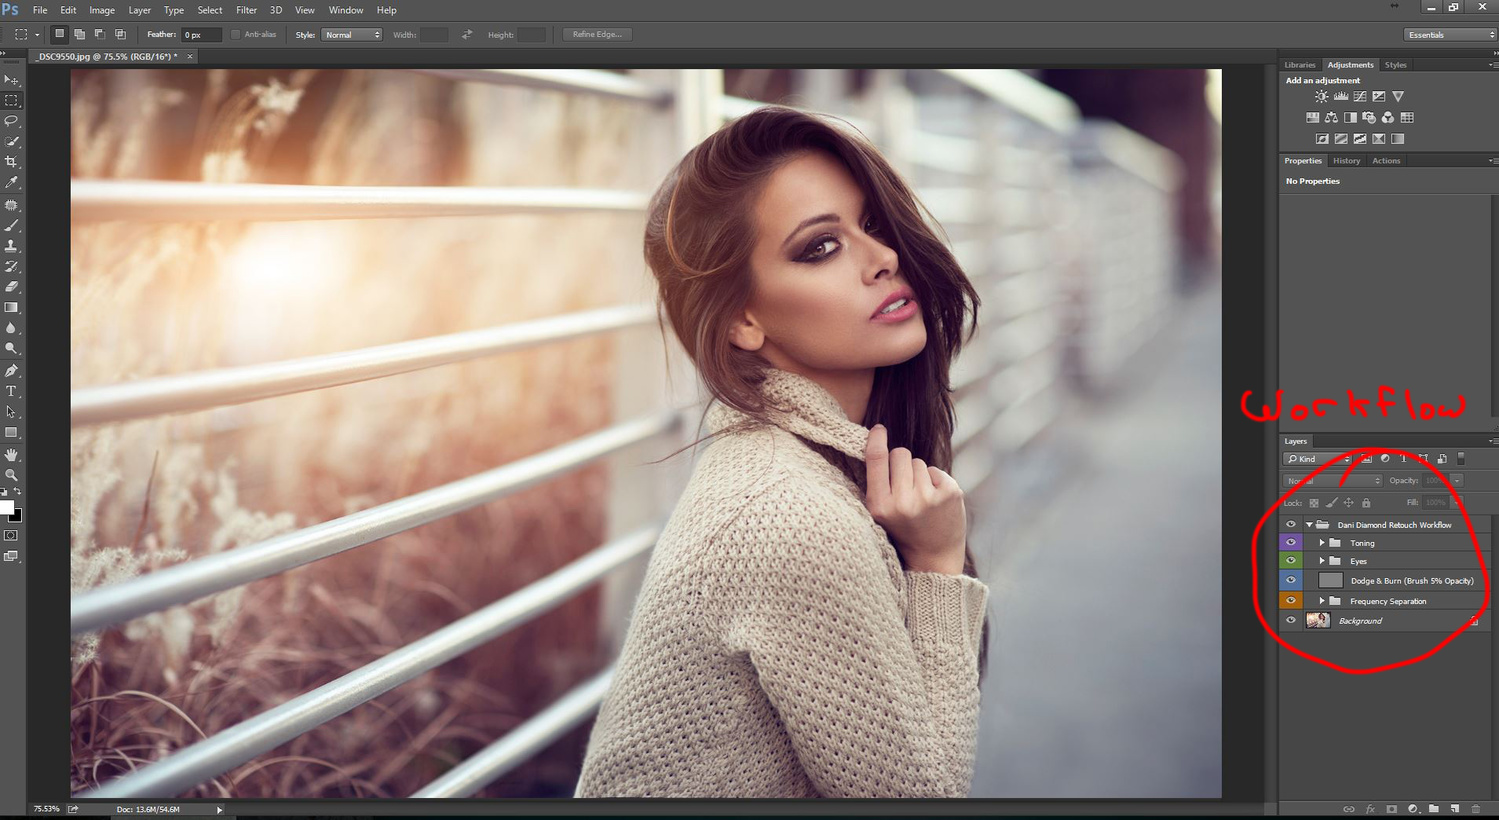
Frequency Separation
The purpose of frequency separation is to fix mismatched skin tones. Here's a tutorial that explains it. If you find this method to be lengthy and you're loosing patience jump to the next video that will teach you a more simple method to fixing skin tone issues.